

https://github.com/moonabid/Netflix-clone-moonabid.git
 Step1: Launch an Ec2 Instance
To launch an AWS EC2 instance with Ubuntu 22.04 using the AWS Management Console, sign in to your AWS account, access the EC2 dashboard, and click "Launch Instances." In "Step 1," select "Ubuntu 22.04" as the AMI, and in "Step 2," choose "t2.medium" as the instance type. Configure the instance details, storage, tags, and security group settings according to your requirements. Review the settings, create or select a key pair for secure access, and launch the instance. Once launched, you can connect to it via SSH using the associated key pair.
Step2A: Install Docker and Run Sonarqube Container
Connect to your Ec2 instance using Putty, Mobaxtreme or Git bash and install docker on it.
COPY
COPY
sudo apt-get update
sudo apt install docker.io -y
sudo usermod -aG docker ubuntu
newgrp docker
sudo chmod 777 /var/run/docker.sock
Pull the SonarQube Docker image and run it.
After the docker installation, we will create a Sonarqube container (Remember to add 9000 ports in the security group).
COPY
COPY
docker run -d --name sonar -p 9000:9000 sonarqube:lts-community Now copy the IP address of the ec2 instance
COPY
COPY
<ec2-public-ip:9000> Provide Login and password
COPY
COPY
login admin
password admin Update your Sonarqube password & This is the Sonarqube dashboard
 Step2B: Integrating SonarQube with GitHub Actions
Integrating SonarQube with GitHub Actions allows you to automatically analyze your code for quality and security as part of your continuous integration pipeline.
We already have Sonarqube up and running
On Sonarqube Dashboard click on Manually Next, provide a name for your project and provide a Branch name and click on setup
 On the next page click on With GitHub actions
 This will Generate an overview of the Project and provide some instructions to integrate
 Let's Open your GitHub and select your Repository
In my case it is Netflix-clone and Click on Settings Search for Secrets and variables and click on and again click on actions
 It will open a page like this click on New Repository secret
 Now go back to Your Sonarqube Dashboard
Copy SONAR_TOKEN and click on Generate Token
Click on Generate
Let's copy the Token and add it to GitHub secrets Now go back to GitHub and Paste the copied name for the secret and token
Name: SONAR_TOKEN
Secret: Paste Your Token and click on Add secret Now go back to the Sonarqube Dashboard
Copy the Name and Value Go to GitHub now and paste-like this and click on add secret
 Our Sonarqube secrets are added and you can see
 Go to Sonarqube Dashboard and click on continue
 Now create your Workflow for your Project. In my case, the Netflix project is built using React Js. That's why I am selecting Other
 Now it Generates and workflow for my Project
 Go back to GitHub. click on Add file and then create a new file
 Go back to the Sonarqube dashboard and copy the file name and content
 Here file name (in my case only )
COPY
COPY
sonar-project.properties
The content to add to the file is (copied from the above image)
COPY
COPY
sonar.projectKey=Netflix
Add in GitHub like this Let's add our workflow
To do that click on Add file and then click on Create a new file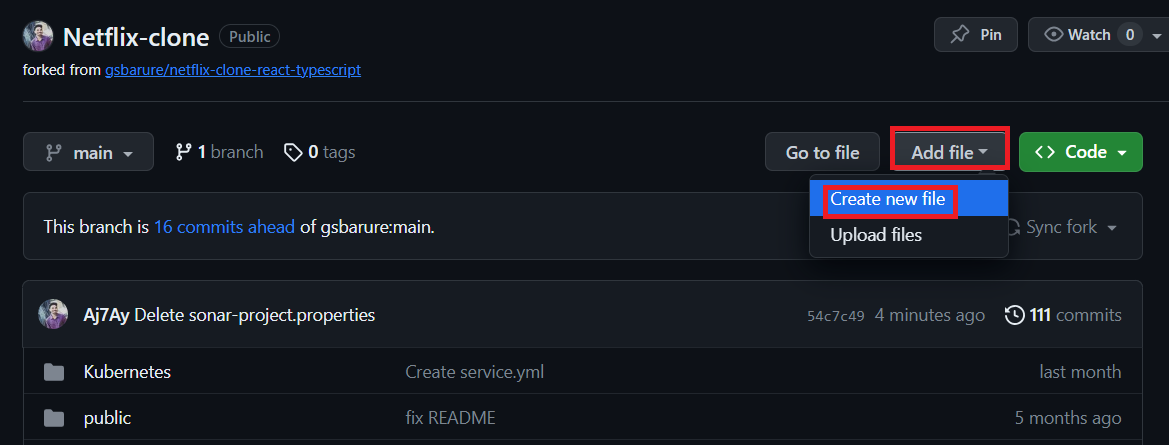 Here is the file name
COPY
COPY
.github/workflows/build.yml #you can use any name iam using sonar.yml Copy content and add it to the file
COPY
COPY
name: Build,Analyze,scan
on:
push:
branches:
- main
jobs:
build-analyze-scan:
name: Build
runs-on: ubuntu-latest
steps:
- name: Checkout code
uses: actions/checkout@v2
with:
fetch-depth: 0 # Shallow clones should be disabled for a better relevancy of analysis
- name: Build and analyze with SonarQube
uses: sonarsource/sonarqube-scan-action@master
env:
SONAR_TOKEN: ${{ secrets.SONAR_TOKEN }}
SONAR_HOST_URL: ${{ secrets.SONAR_HOST_URL }} Click on commit changes
 Now workflow is created.
Click on Actions now Now it's automatically started the workflow
 Let's click on Build and see what are the steps involved
 Click on Run Sonarsource and you can do this after the build completion
 Build complete.
 Go to the Sonarqube dashboard and click on projects and you can see the analysis
 If you want to see the full report, click on issues.
Step3: Let's scan files using Trivy
Add this code to your sonar.yml (I mean workflow)
COPY
COPY
- name: install trivy
run: |
#install trivy
sudo apt-get install wget apt-transport-https gnupg lsb-release -y
wget -qO - https://aquasecurity.github.io/trivy-repo/deb/public.key | gpg --dearmor | sudo tee /usr/share/keyrings/trivy.gpg > /dev/null
echo "deb [signed-by=/usr/share/keyrings/trivy.gpg] https://aquasecurity.github.io/trivy-repo/deb $(lsb_release -sc) main" | sudo tee -a /etc/apt/sources.list.d/trivy.list
sudo apt-get update
sudo apt-get install trivy -y
#command to scan files
trivy fs .
GitHub Actions workflow step that installs Trivy, a popular open-source vulnerability scanner for containers, and then uses it to scan the files.
I added a step in the workflow Commit changes
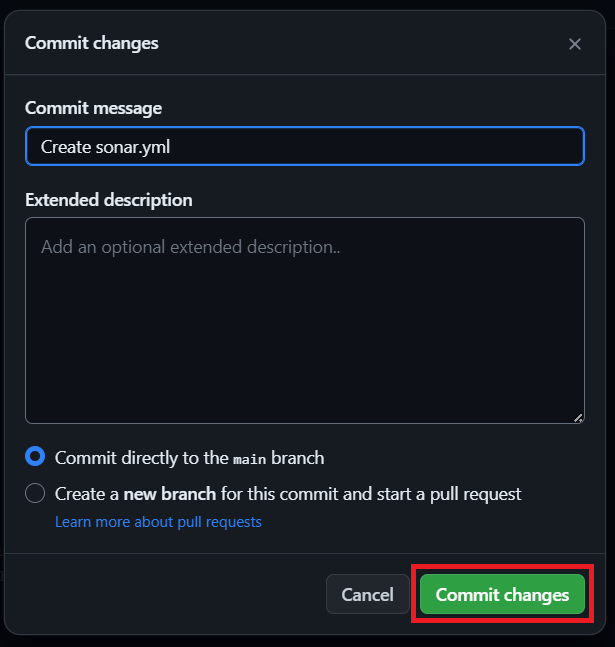 Click on actions again
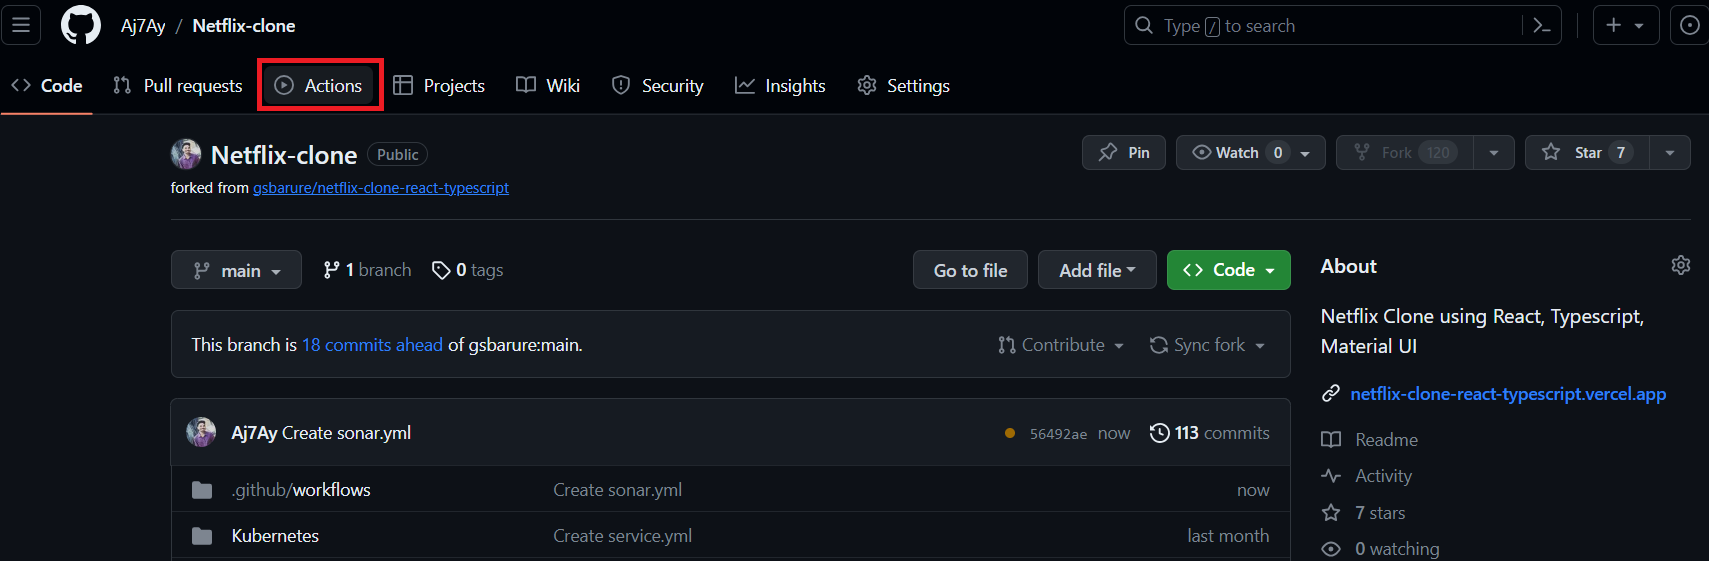 It started the workflow build
 Click on Build, Analyze and scan
 It installed Trivy version 0.46.0 and scanned files also. See report
 The file scan is completed, this is another security check
Step4A: Docker build and push to Dockerhub
Create a Personal Access token for your Dockerhub account
Go to docker hub and click on your profile --> Account settings --> security --> New access token It asks for a name Provide a name and click on generate token
 Copy the token save it in a safe place, and close
 Now Go to GitHub again and click on settings
 Search for Secrets and variables and click on and again click on actions
 It will open a page like this click on New Repository secret
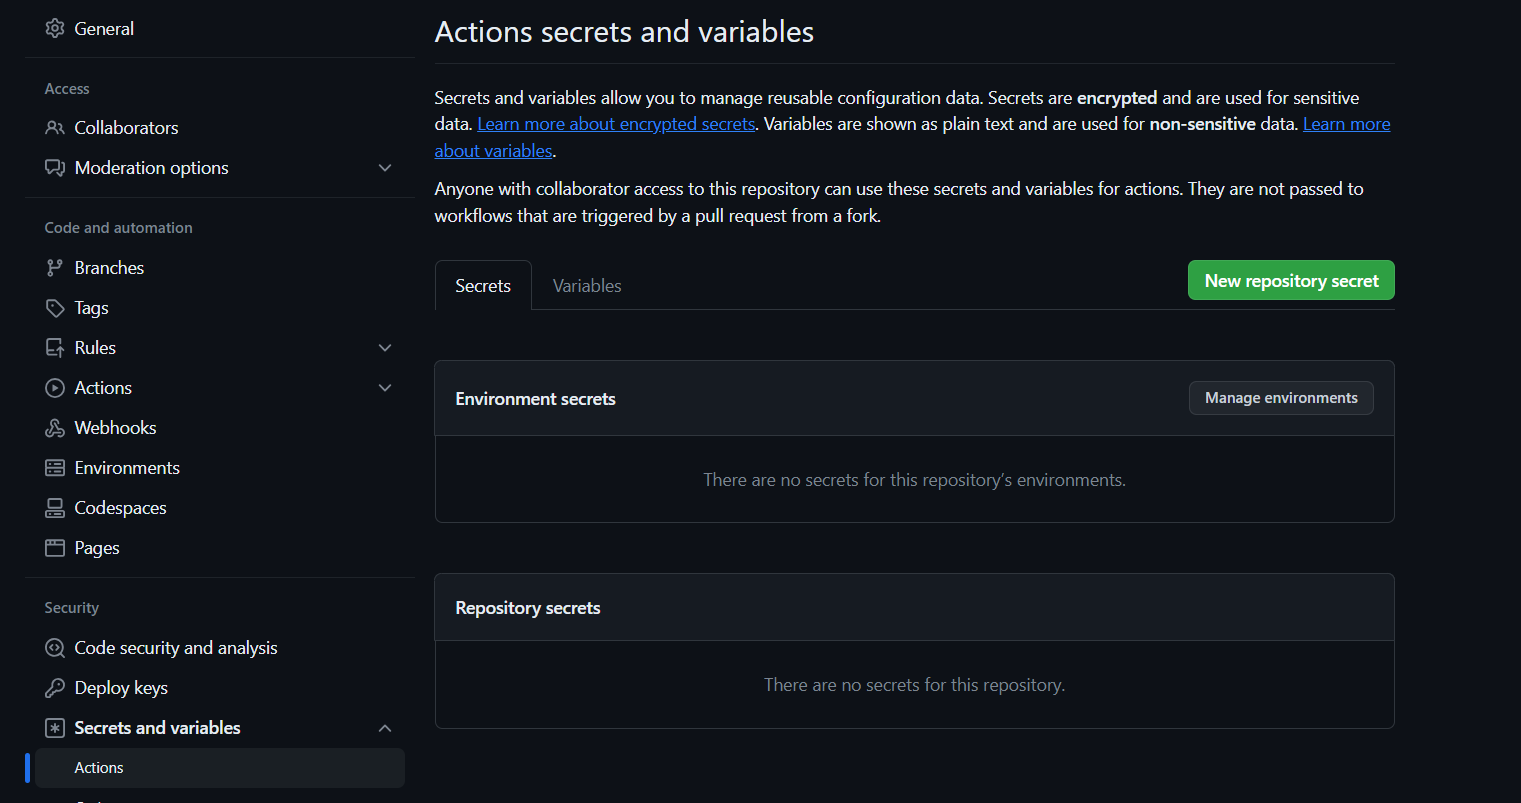 Add your Dockerhub username with the secret name as
COPY
COPY
DOCKERHUB_USERNAME #use your dockerhub username Click on Add Secret.
Let's add our token also and click on the new repository secret again
Name
COPY
COPY
DOCKERHUB_TOKEN Paste the token that you generated and click on Add secret.
Step4B: Create a TMDB API Key
Next, we will create a TMDB API key
Open a new tab in the Browser and search for TMDB Click on the first result, you will see this page
 Click on the Login on the top right. You will get this page.
You need to create an account here. click on click here. I have an account that's why I added my details there. once you create an account you will see this page.
 Let's create an API key, By clicking on your profile and clicking settings.
 Now click on API from the left side panel.
 Now click on create
 Click on Developer
 Now you have to accept the terms and conditions.
 Provide basic details
 Click on submit and you will get your API key.
 Let's add the below step to the workflow
You have to add API at the Build command
Change your username also
COPY
COPY
- name: Docker build and push
run: |
#run commands to build and push docker images
docker build --build-arg TMDB_V3_API_KEY=<USE YOUR API KEY> -t netflix .
docker tag netflix sevenajay/netflix:latest
docker login -u ${{ secrets.DOCKERHUB_USERNAME }} -p ${{ secrets.DOCKERHUB_TOKEN }}
docker push sevenajay/netflix:latest
env:
DOCKER_CLI_ACI: 1
You can see the image, I already added Let's commit changesClick on actions againIt started the workflow build
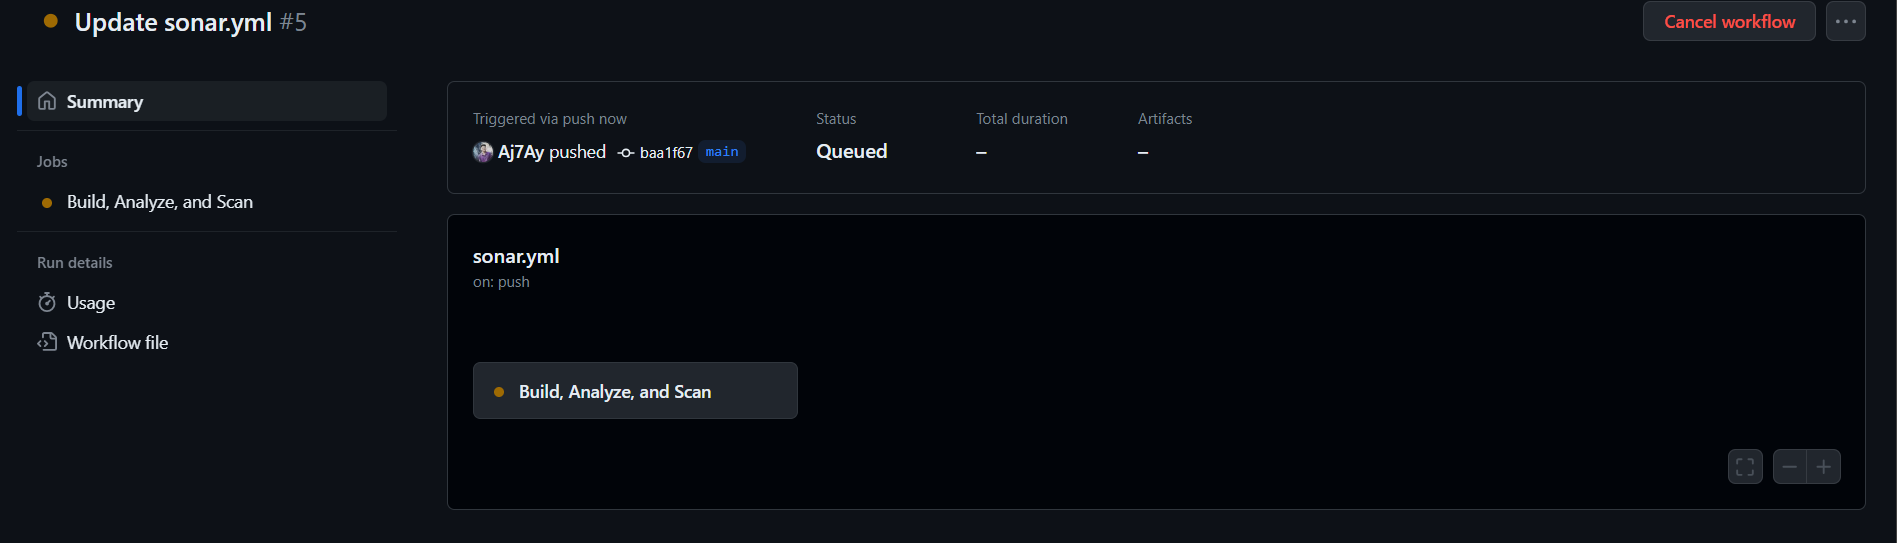 Click on Build, Analyze and Scan. You will see this Docker image is building now
 Build Succeeded
 If you go to your Docker hub, you will find that the image is pushed to Dockerhub
Step5A: Add a self-hosted runner to Ec2
Go to GitHub and click on Settings --> Actions --> Runners Click on New self-hosted runner
 Now select Linux and Architecture X64
 Use the below commands to add a self-hosted runner
 Go to Putty or Mobaxtreme and connect to your ec2 instance
And paste the commands
NOTE: USE YOUR RUNNER COMMANDS (EXAMPLE CASE IAM USING MINE)
COPY
COPY
mkdir actions-runner && cd actions-runner The command "mkdir actions-runner && cd actions-runner" is used to create a new directory called "actions-runner" in the current working directory and then immediately change the current working directory to the newly created "actions-runner" directory. This allows you to organize your files and perform subsequent actions within the newly created directory without having to navigate to it separately.
COPY
COPY
curl -o actions-runner-linux-x64-2.310.2.tar.gz -L https://github.com/actions/runner/releases/download/v2.310.2/actions-runner-linux-x64-2.310.2.tar.gz
This command downloads a file called "actions-runner-linux-x64-2.310.2.tar.gz" from a specific web address on GitHub and saves it in your current directory. Let's validate the hash installation
COPY
COPY
echo "fb28a1c3715e0a6c5051af0e6eeff9c255009e2eec6fb08bc2708277fbb49f93 actions-runner-linux-x64-2.310.2.tar.gz" | shasum -a 256 -c Now Extract the installer
COPY
COPY
tar xzf ./actions-runner-linux-x64-2.310.2.tar.gz
Let's configure the runner
COPY
COPY
./config.sh --url https://github.com/Aj7Ay/Netflix-clone --token A2MXW4323ALGB72GGLH34NLFGI2T4
Let's start runner
COPY
COPY
./run.sh
Step5B: Final workflow to run the container
Let's add a deployment workflow
COPY
COPY
deploy:
needs: build-analyze-scan
runs-on: [aws-netflix]
steps:
- name: Pull the docker image
run: docker pull sevenajay/netflix:latest
- name: Trivy image scan
run: trivy image sevenajay/netflix:latest
- name: Run the container netflix
run: docker run -d --name netflix -p 8081:80 sevenajay/netflix:latest
deploy:: This is the name of a workflow or job, likely associated with a CI/CD pipeline. It specifies what should happen when this deployment job is triggered.needs: build-analyze-scan: This line indicates that this deployment job depends on the successful completion of a previous job named "build-analyze-scan." In other words, it waits for "build-analyze-scan" to finish before starting.runs-on: [aws-netflix]: This job is set to run on a specific type of runner or environment, labeled as "aws-netflix." Runners are the environments where jobs are executed, and "aws-netflix" suggests that this deployment might be intended for an AWS-based infrastructure.steps:: This section lists the individual steps or tasks to be executed as part of the deployment job.name: Pull the docker image: This step has a descriptive name. It uses the docker pull command to fetch a Docker image labeled "sevenajay/netflix:latest." This is a common step in container-based deployments, where it ensures that the latest version of the Docker image is available locally.name: Trivy image scan: This step performs a security scan on the Docker image "sevenajay/netflix:latest" using a tool called Trivy. Trivy is used for vulnerability scanning of container images.name: Run the container netflix: This step starts a Docker container named "netflix" using the image "sevenajay/netflix:latest." It runs the container in detached mode ("-d") and maps port 8081 on the host to port 80 in the container, making the service accessible via port 8081 on the host.This workflow is designed to automate the deployment of a Docker container, with checks for the latest image, a security scan, and launching the container. The success of this job depends on the success of the preceding "build-analyze-scan" job, and it's meant to be executed on the specified runner, possibly in an AWS environment.
Commit changes
Click on actions againYou will see two different Jobs now Click on Build and Push docker image Build (using the above image), you will see this once the first job completes
 Now come back by clicking on Summary and click on Deploy now
 You can see how it's pulling image and scanning image
 It starts running the job on your Ec2 instance
 Now it's completed running the container
 You will see this in the instance
 On GitHub, you will see this. the build succeeded
 Now copy your ec2 instance ip and go to the browser
COPY
COPY
<Ec2-instance-ip:8081>
You will see Netflix app will run
 Deployment is done.
FULL WORKFLOW
COPY
COPY
name: Build,Analyze,scan
on:
push:
branches:
- main
jobs:
build-analyze-scan:
name: Build
runs-on: ubuntu-latest
steps:
- name: Checkout code
uses: actions/checkout@v2
with:
fetch-depth: 0 # Shallow clones should be disabled for a better relevancy of analysis
- name: Build and analyze with SonarQube
uses: sonarsource/sonarqube-scan-action@master
env:
SONAR_TOKEN: ${{ secrets.SONAR_TOKEN }}
SONAR_HOST_URL: ${{ secrets.SONAR_HOST_URL }}
- name: install trivy
run: |
#install trivy
sudo apt-get install wget apt-transport-https gnupg lsb-release -y
wget -qO - https://aquasecurity.github.io/trivy-repo/deb/public.key | gpg --dearmor | sudo tee /usr/share/keyrings/trivy.gpg > /dev/null
echo "deb [signed-by=/usr/share/keyrings/trivy.gpg] https://aquasecurity.github.io/trivy-repo/deb $(lsb_release -sc) main" | sudo tee -a /etc/apt/sources.list.d/trivy.list
sudo apt-get update
sudo apt-get install trivy -y
#scanning files
trivy fs .
- name: Docker build and push
run: |
#run commands to build and push docker images
docker build --build-arg TMDB_V3_API_KEY=Aj7ay86fe14eca3e76869b92 -t netflix .
docker tag netflix sevenajay/netflix:latest
docker login -u ${{ secrets.DOCKERHUB_USERNAME }} -p ${{ secrets.DOCKERHUB_TOKEN }}
docker push sevenajay/netflix:latest
env:
DOCKER_CLI_ACI: 1
deploy:
needs: build-analyze-scan
runs-on: [aws-netflix]
steps:
- name: Pull the docker image
run: docker pull sevenajay/netflix:latest
- name: Trivy image scan
run: trivy image sevenajay/netflix:latest
- name: Run the container netflix
run: docker run -d --name netflix -p 8081:80 sevenajay/netflix:latest