In this article on series basics on Kubernetes, we are going to talk about what is the component of nodes in Kubernetes and what are their tasks. Before that, if you have not read about the control plane in Kubernetes, you can read about it below.
Node components:
Node components are the process that will run on nodes to facilitate the working of Kubernetes. The components are kube-proxy, kubelet, and container runtime.
Kube-proxy:
Kube proxy helps in routing the traffic with help of iptables to the exact location when you call any service. It makes changes in iptables to help the packet reach a destination when a service is called. If you want to read more about it you can read the below article.
Kubelet:
Kubelet is a process that manages different tasks on a node, like join the Kubernetes cluster and launching the pods. Keeping the health on a node as well as pods. You can read about it more in below article
Container Runtime:
Container runtime is a process that takes care of containers. It launches the container as instructed by kubelet. In most cases, you must have seen or used docker. Containerd, CRI-O are other options that can be used. If you want to read what happens in container launch you can read the below article.
Process control block (PCB) is a data structure used by a computer operating system to store all the information about a process.
The operating system used a data structure named Process Control Block(PCB) to store the information about a particular process, and this information is required by the CPU while executing the process. Each process is identified by its process block, the process control block is also known as a task control block.
When a process is created (initialized or installed), the operating system creates a corresponding process control block. Information in a process control block is updated during the transition of process states. When the process terminates, its PCB is returned to the pool from which new PCBs are drawn. Each process has a single PCB.
Components of PCB are
Process state
Basically stores the respective stage of the program whether the process is in a new, ready, running, or terminated state, etc. So, to understand this process state clearly, we have to understand the process life cycle first.
In the process life cycle, we discuss how a process goes through various process states before its termination.
New: Process has just been created in this state. It is the initial state in the process life cycle.
Ready:In this process is ready and is waiting to be assigned to the processor so it can run.
Ready suspended: Process goes through this state when we have a lack of main memory and because of this, the process is going into a ready suspended process state(which is in secondary memory) and when space is created in the main memory it came back to the ready process state and then gets executed.
Running: After the ready process state process is dispatched into the running state and in this running state, we have three cases
Case 1: When the process is completed without any interruption and directly goes into a termination state.
Case 2: When interrupt takes place – Interrupts are signals sent to CPU by external devices. They tell the CPU to stop its current activity. The controls then pass to a special piece of code called an interrupt handler. The interrupt handler will process the interrupt and resume the interrupted program.
Case3: I/O request When a process request for I/O for its completion then the process goes into a blocked process state until the I/O request is completed and when the request is completed the process came back to ready state and from there it goes to running and then to the terminated state after its execution.When a process request for I/O for its completion then the process goes into a blocked process state until the I/O request is completed and when the request is completed the process came back to ready state and from there it goes to running and then to the terminated state after its execution.
Blocked:Process comes to this state when it is waiting for some event to occur. For ex- I/O request.
Blocked Suspended:It is similar to a ready suspended state. Processes in a blocked suspended state are in secondary memory, a process in the blocked state is in main memory but due to lack of memory, they are forced to move in the blocked suspended state.
Terminated: The process is removed from the main memory and its process control block is deleted.
Process Counter
Process Counter is a special kind of register that is used by the processor to hold the address of the next instruction to be executed.
Process Number
A unique identifier for the process.
CPU Register
CPU register tells us about the different kinds of registers that are being used by a particular process. They may include accumulators, index registers, stack pointer, and general-purpose registers.
Memory Limit
It contains information about the memory management system used by the operating system. This may include page tables, segment tables, etc.
List of open files
It represents the files associated with the process. So the CPU should maintain a list of files that are being opened by a process to make sure that no other process can open the files at the same time.
Miscellaneous Accounting and Status data
This includes information about the amount of CPU used, time constraints, process number, etc.
This was very small article about PCB and its component. If you like the article please share and subscribe.
A pod is a group of containers and is the most basic deployable object in Kubernetes. As mentioned it is a group of containers. These mean containers share pod resources. Even though they share pod resources they cannot access each other’s processes as they are separated by namespaces.
Containers on the same pod can access each other on localhost. This is because they share the same network namespace.
They can also share storage if mentioned in their specifications.
You can consider pods as a host where you can deploy multiple containers and they can talk to each other.
Why are pods needed?
You can use a pod to run an instance of your application. You generally use replicaset to create a set of the pod to run your application. Replicaset can control how many pods of your specification will run and it can make sure they are running. If a pod dies, replicaset will launch another one to satisfy the threshold.
There can also be an init container that comes up before other containers and does some admin tasks. You can read about it below
What are the different stages in pod’s lifecycle?
Pending
The pod is created in the cluster but is not launched completely yet. It may be due to a resource issue that is not scheduled, maybe due to one of the containers not coming up due to some health check or maybe downloading the image of the container.
Running
In this state, the pod is running and is ready to take traffic or do its tasks. In this state, the containers are created and one of them is running properly.
Succeded
All the containers in the pod have completed their tasks and are terminated successfully.
Failed
One of the containers is terminated due to failure. Failure means non 0 exit code.
Unknown
As mentioned the state is not known.
There are other states that you can see but they are not actually pod’s lifecycle states. The states can be CRASHLOOPBACKOFF, IMAGEPULLBACKOFF, etc.
Below is the spec that you can use to create a pod in Kubernetes.
In this spec. You can see different fields that you can use to launch the pod. In this pod, only one container is launched with an image busybox, and a volume is attached at /persistent path.
When you submit this YAML a pod will be launched with the above specifications. I am not going deep into each pod field. You can read the below documentation for reading more about these.
A Kubernetes secret is an object storing sensitive pieces of data such as usernames,passwords, tokens, and keys. Secrets are created by the system during an app installation or by users whenever they need to store sensitive information and make it available to a pod.
If passwords, tokens, or keys were simply part of a pod definition or container image, they could be accidentally exposed during Kubernetes operations. Therefore, the most important function of the secret is to prevent accidental exposure of the information stored in it while at the same time making it available wherever the user needs it.
Note: Secrets are not the only way to manage sensitive information in Kubernetes. By using the system’s declarative nature, it is easy to integrate third-party information management solutions.
Kubernetes Secret Types
Kubernetes features two categories of secrets:
The system’s service accounts automatically create built-in secrets and associate them with containers together with API credentials.
You can also create customized secrets for credentials you need to make available to pods.
Built-in secrets come in several types, corresponding to popular usage scenarios:
Built-in Type
Description
Opaque
This is the default type of secret. The secrets whose configuration file does not contain the type statement are all considered to be of this type. Opaque secrets are designed to store arbitrary user data.
kubernetes.io/service-account-token
Service account token secrets store tokens identifying service accounts. Upon creation of a pod, Kubernetes automatically creates this secret and associates it with the pod, enabling secure access to the API. This behavior can be disabled.
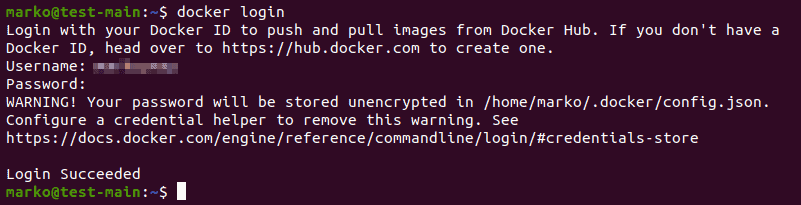
kubernetes.io/dockercfg
Accessing a Docker registry for images requires valid Docker credentials. This type of secret is used to store a serialized ~/.dockercfg legacy format for Docker command-line configuration. It contains the base64-encoded .dockercfg key.
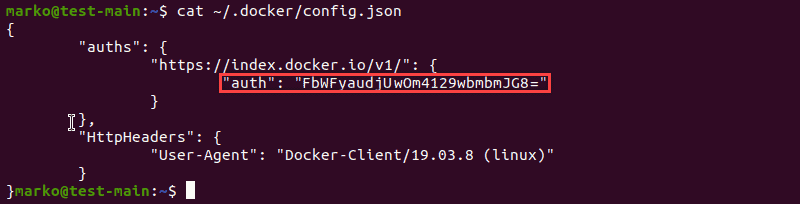
kubernetes.io/dockerconfigjson
This type of secret features a .dockerconfigjson key, which is a base64-encoded version of the ~/.docker/config.json file, a new version of the deprecated .dockercfg.
kubernetes.io/basic-auth
The secret for storing basic authentication data. It must contain two keys – username and password.
kubernetes.io/ssh-auth
For storing data necessary for establishing an SSH connection, use ssh-auth type. This type’s data field must contain an ssh-privatekey key-value pair.
kubernetes.io/tls
This type is used to store TLS certificates and keys. The most common usage scenario is Ingress resource termination, but the tls type is also sometimes used with other resources.
bootstrap.kubernetes.io/token
Tokens used during the node bootstrap process are stored using the token secret type. This type is usually created in the kube-system namespace.
Note: The basic-auth, ssh-auth, and tls types are provided for the user’s convenience, given that the Opaque type already offers the same functionality. However, using a specific built-in format for each scenario helps organize credentials.
To define a customized type of secret, assign a non-empty string as a value in the type field of the secret file. Leaving the field empty tells Kubernetes to assume the Opaque type. The customized type frees the secret of constraints posed by built-in types.
Using Kubernetes Secrets
When you create a secret, it needs to be referenced by the pod that will use it. To make a secret available for a pod:
1. Mount the secret as a file in a volume available to any number of containers in a pod.
2. Import the secret as an environment variable to a container.
3. Use kubelet, and the imagePullSecrets field.
The following sections explain how to create Kubernetes secrets, as well as how to decode and access them.
Create Kubernetes Secrets
To create a Kubernetes secret, apply one of the following methods:
Use kubectl for a command-line based approach.
Create a configuration file for the secret.
Use a generator, such as Kustomize to generate the secret.
Note: A secret must have a name that is a valid DNS subdomain name.
Create Secrets Using kubectl
1. To start creating a secret with kubectl, first create the files to store the sensitive information:
The -n option tells echo not to append a new line at the end of the string. The new line is also treated as a character, so it would be encoded together with the rest of the characters, producing a different encoded value.
2. Now, use kubectl to create a secret using the files from the previous step. Use the generic subcommand to create an Opaque secret. Also, add the --from-file option for each of the files you want to include:
The example above states db-credentials as the name of the secret and uses two previously created files, username.txt, and password.txt, as data values.
2. Alternatively, to provide the unencrypted, literal version of the data values, include the literals section with key-value pairs you wish to store:
3. Save the file and use the following command in the folder where kustomization.yaml is located:
kubectl apply -k .
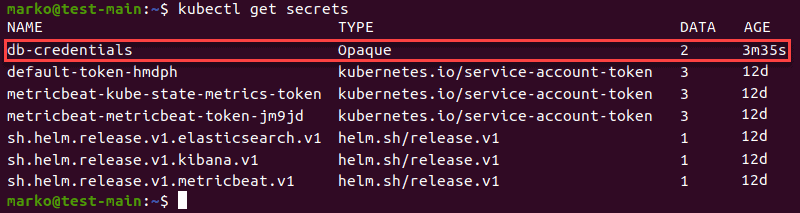
The output confirms the creation of the secret:
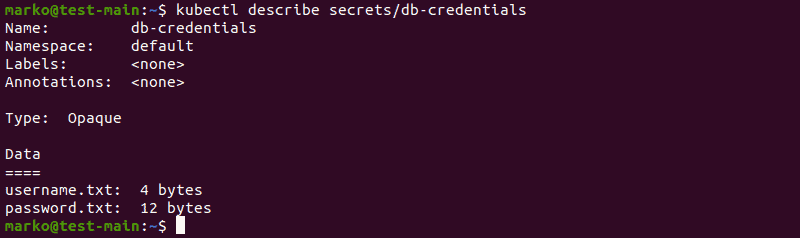
Use kubectl describe to See Created Secrets
The kubectl describe command shows basic information about Kubernetes objects. Use it to view the description of a secret.
kubectl describe secrets/[secret]
The first example shows the secret created by providing files as data values:
The second example describes the secret created using string literals. Notice the change in the Data section, which now shows names of the keys instead of filenames:
Decode Secrets
1. To decode the values in a secret, access them by typing the following command:
kubectl get secret [secret] -o jsonpath='{.data}'
The output shows the encoded key-value pairs stored in the data section:
2. Use the echo command to type the encoded string and pipe the output to the base64 command:
echo '[encoded-value]' | base64 --decode
The decoded strings appear as the output:
Access Secrets Loaded in a Volume
1. To access secrets mounted to a pod in a separate volume, modify the definition of the pod to include a new volume. Choose any volume name you want, but make sure that it is the same as the name of the secret object.
2. Be sure to specify readOnly as true. For example, the pod definition may look like this:
2. Open another terminal instance and use the kubectl exec command to access the pod’s bash shell:
kubectl exec -it [pod] -- /bin/bash
3. cd into /etc/newsecret, and find the files contained in the secret:
cd /etc/newsecret
Project Secrets into a Container Using Environment Variables
1. Another way to access secrets in a Kubernetes pod is to import them as environment variables by modifying the pod definition to include references to them. For example:
6. Finish creating the pod by activating it with kubectl apply:
kubectl apply -f [file]
Kubernetes Secrets Considerations
Kubernetes secrets are a secure way to store sensitive information. However, before you decide on the best method for your usage scenario, you should consider the following points:
Usernames and passwords in Secrets are encoded with base-64. This text-encoding technique obscures data and prevents accidental exposure, but it is not secure against malicious cyber attacks.
Secrets are only available in the cluster in which they are located.
Secrets usually rely on a master key which is used to unlock them all. While there are methods to secure the master key, using them only creates another master key scenario.
To mitigate these problems, apply some of the solutions below:
Integrate a secrets management tool that uses the Kubernetes Service account to authenticate users who need access to the secret vault.
Integrate an IAM (Identity and Access Management) tool to allow the system to use tokens from a Secure Token Service.
Integrate a third-party secrets manager into pods.
Conclusion
After reading this tutorial, you should know what Kubernetes secrets are, which types exist, and how to create a Kubernetes secret. The tutorial also presented ways in which secrets are accessed.